Set Up Apple Pay Expense Tracking in Expensa on iOS 26 and Earlier
Create a Wallet Transaction automation in Shortcuts, map its payment fields to Expensa, and test your Apple Pay expense tracking on iOS 26 and earlier.
Get the appThis guide is for iOS 26 and earlier. It shows the manual Wallet Transaction automation in Shortcuts. On iOS 27 or later, Expensa uses a ready-made shortcut with a Wallet notification trigger; follow the separate iOS 27 setup guide.
For eligible new Apple Pay payments on selected cards, Shortcuts can pass the amount, merchant and date to Expensa without manual entry. This guide walks through that automation. It does not import past Wallet transactions or guarantee that every payment will trigger.
Setting this up in the Philippines, where Apple Pay just launched? There’s a dedicated guide covering the supported banks and local specifics.
What you’ll need
- iPhone with Apple Pay configured
- Expensa installed
- Shortcuts app (built into iOS — no download needed)
Allow a few minutes to create and test the automation.
Need older payments? See what you can export from Wallet and your card provider.
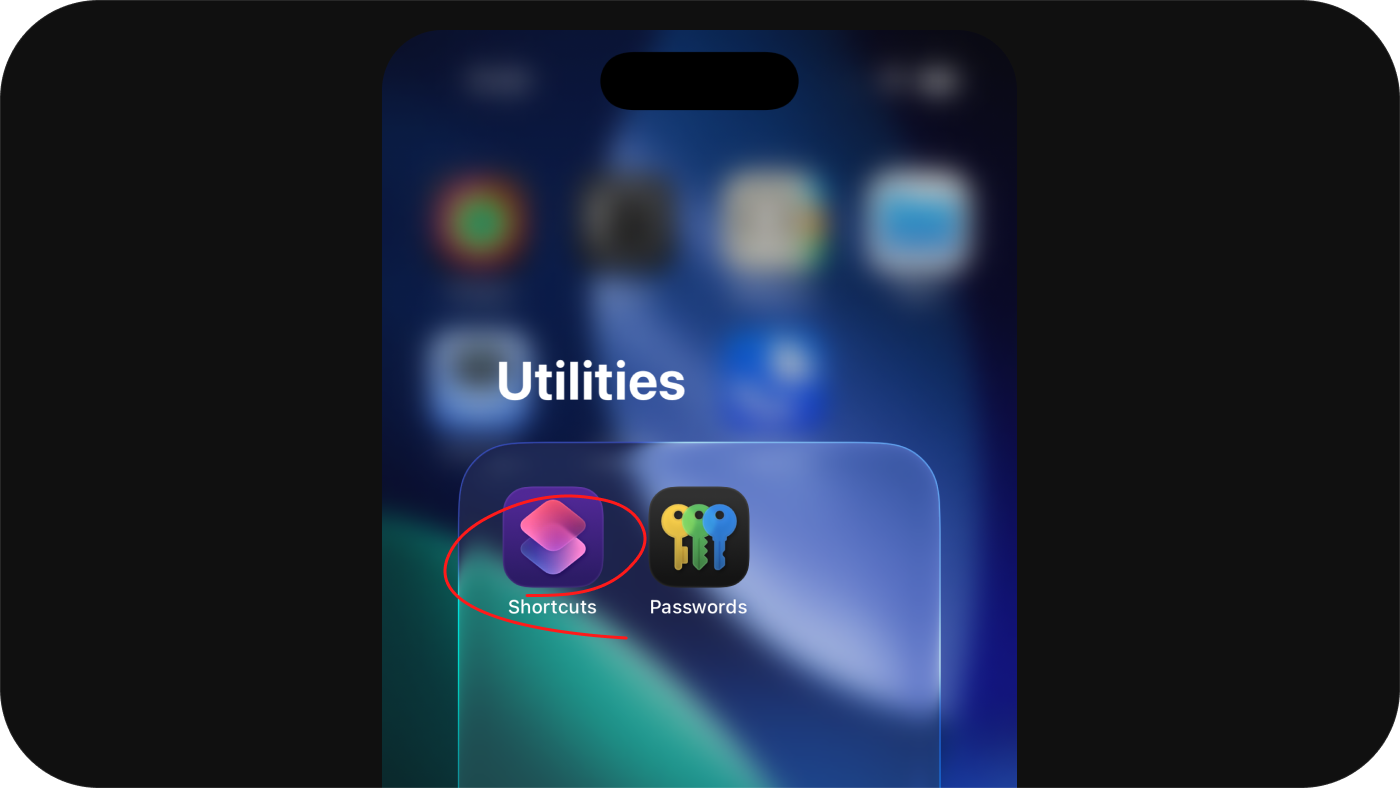
Step 1: Open the Shortcuts app
Find the Shortcuts app on your iPhone and open it. It comes pre-installed on every iPhone running iOS 13 or later — if you’ve never opened it, it’s probably in the Utilities folder.
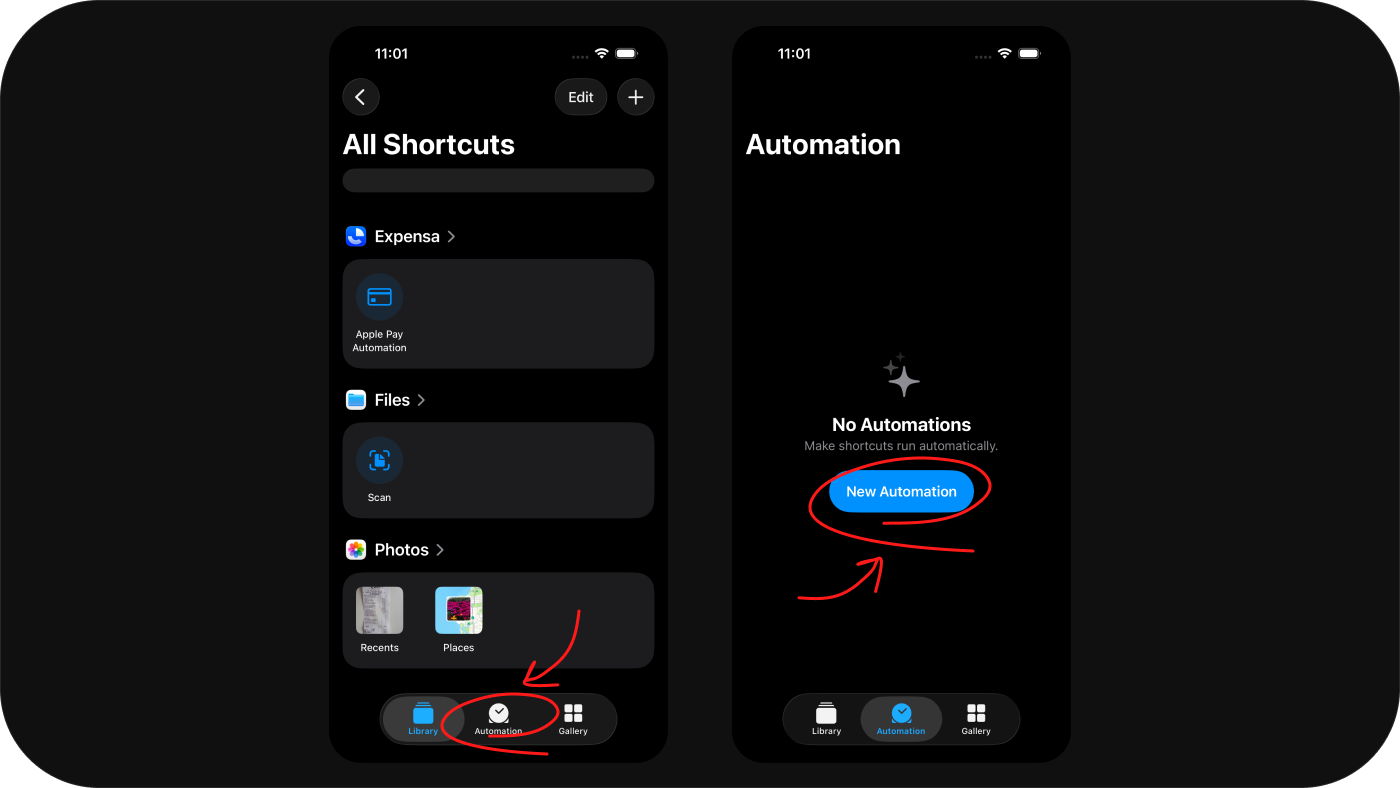
Step 2: Go to the Automation tab and tap “New Automation”
At the bottom of the screen, tap the Automation tab. Then tap the New Automation button to create a new automation.
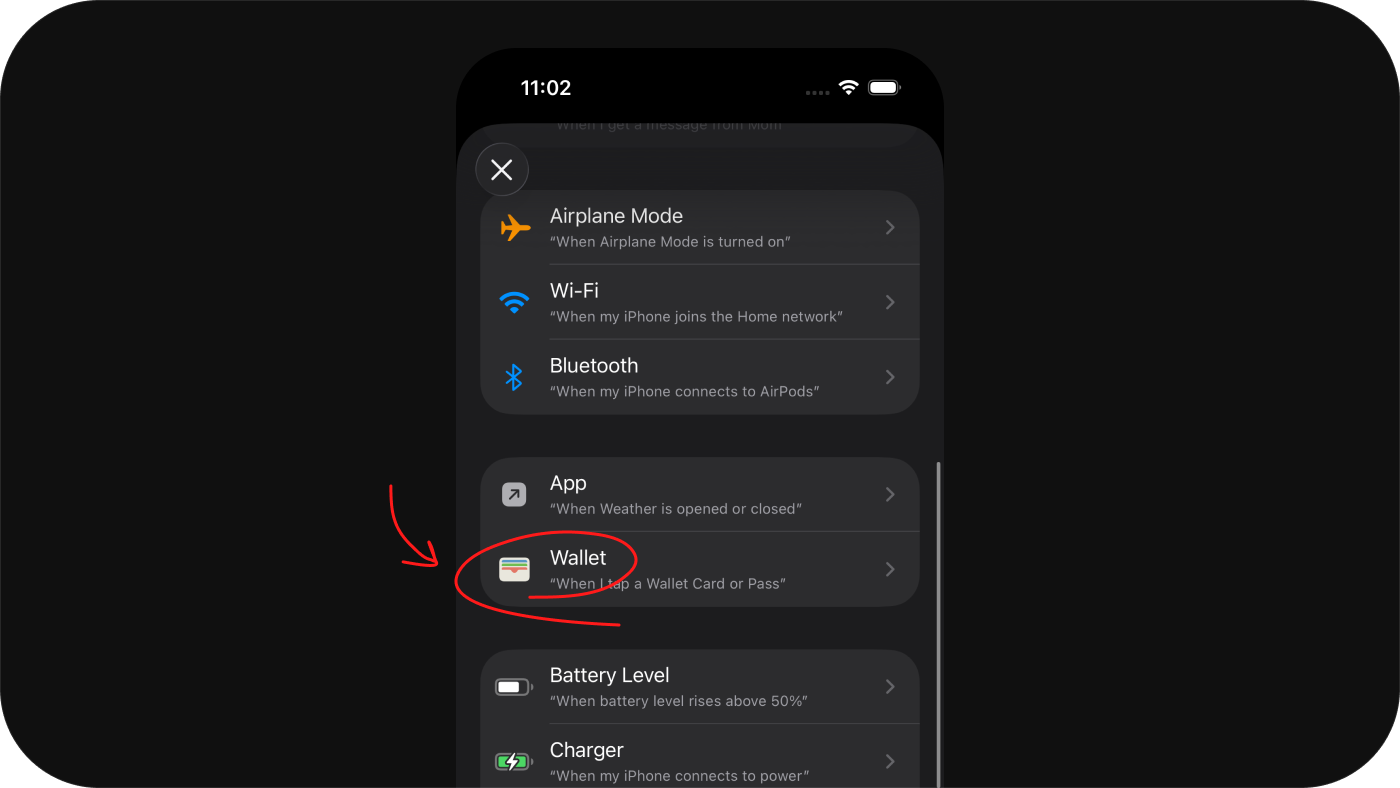
Step 3: Select “Wallet”
Scroll down to find the Wallet Transaction trigger. This is the card-transaction route shown in the screenshots, distinct from the iOS 27 Wallet notification shortcut. Apple explains which card transactions can trigger an automation.
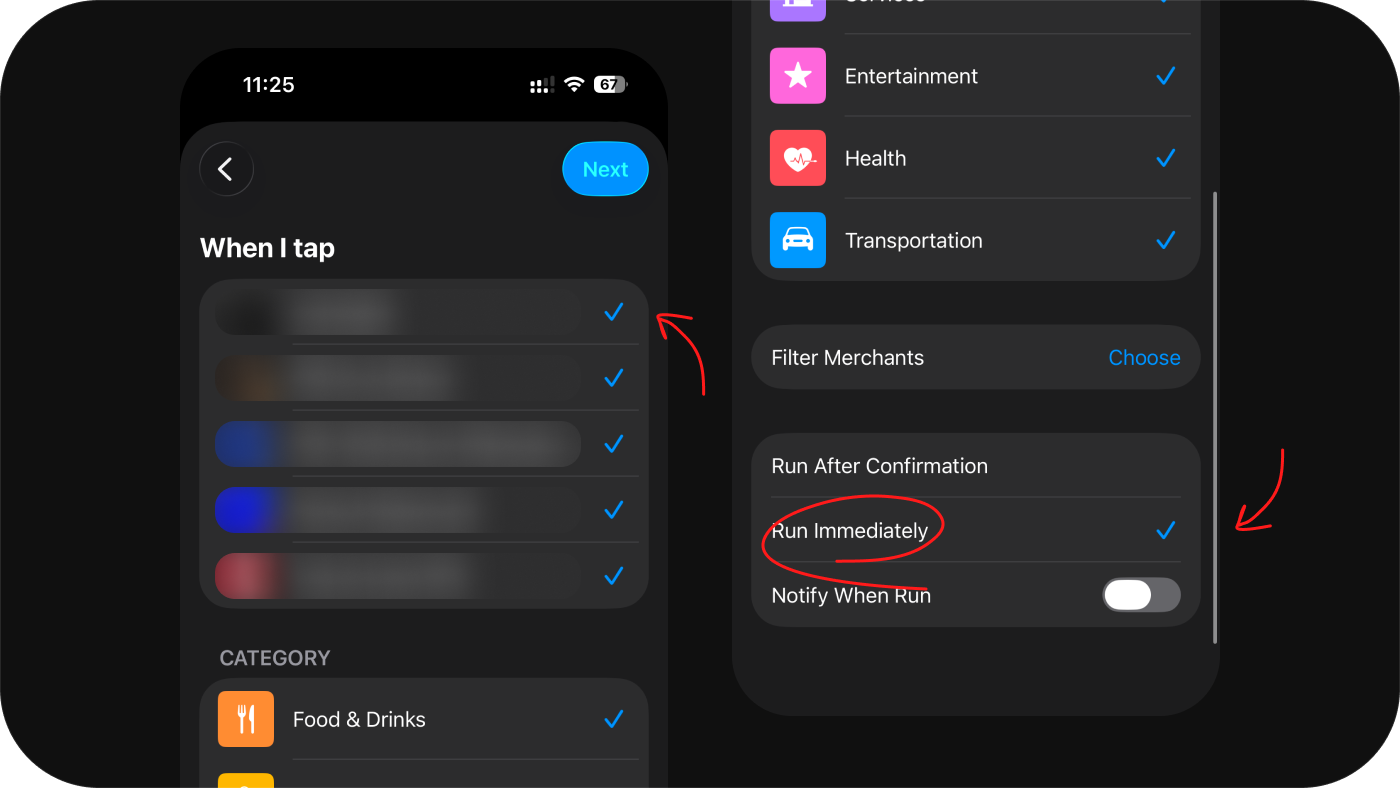
Step 4: Select your cards and set to Run Immediately
Select the cards you want the automation to work with. Then change the run mode to Run Immediately. If you choose Run After Confirmation, Shortcuts will ask for approval before it runs. Run Immediately removes that approval step for qualifying transactions.
Step 5: Tap “Create New Shortcut”
When prompted to choose what the automation does, tap Create New Shortcut. This opens the action editor where you’ll add the Expensa action.
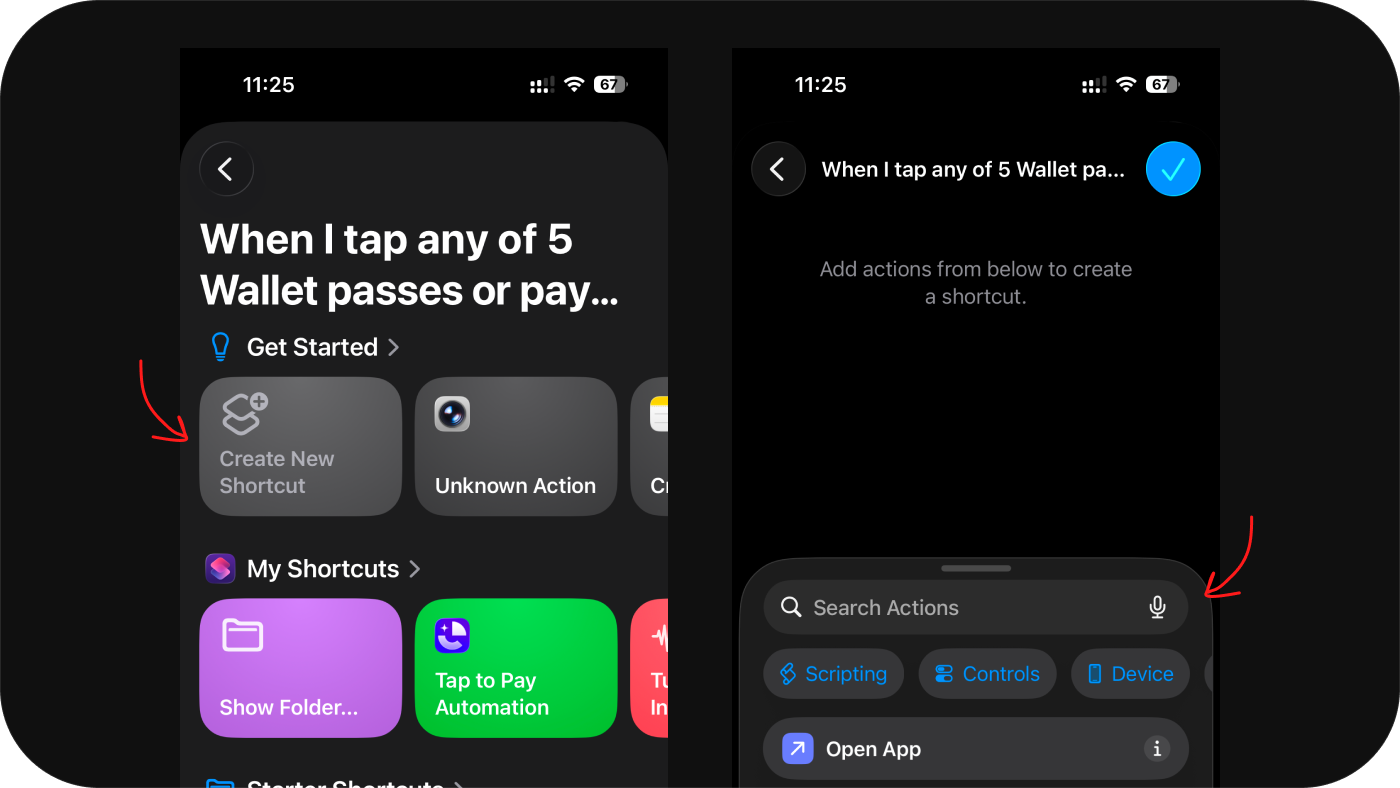
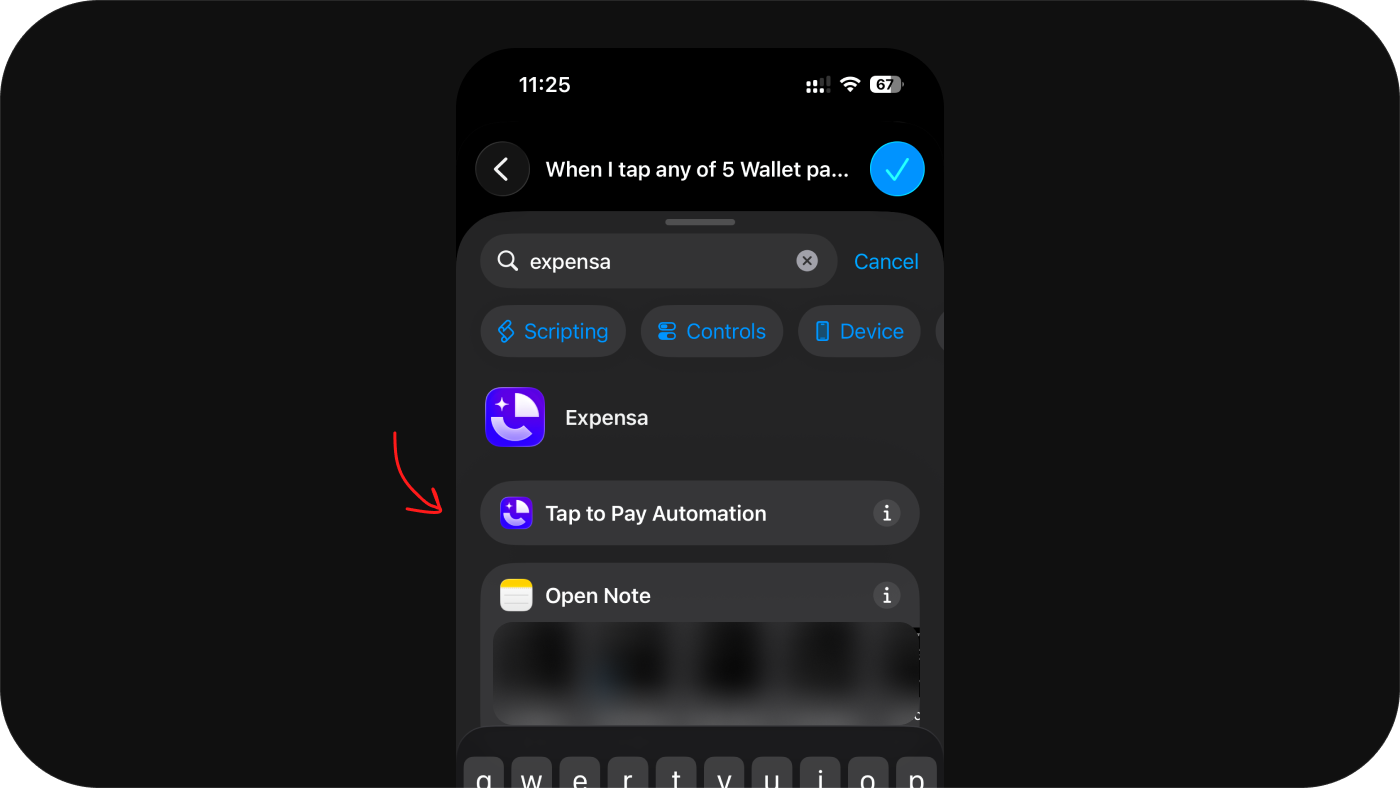
Step 6: Search for and add the Expensa action
In the search bar, type Expensa or Tap to Pay Automation and select it from the results. This is the Expensa action that receives the transaction data.
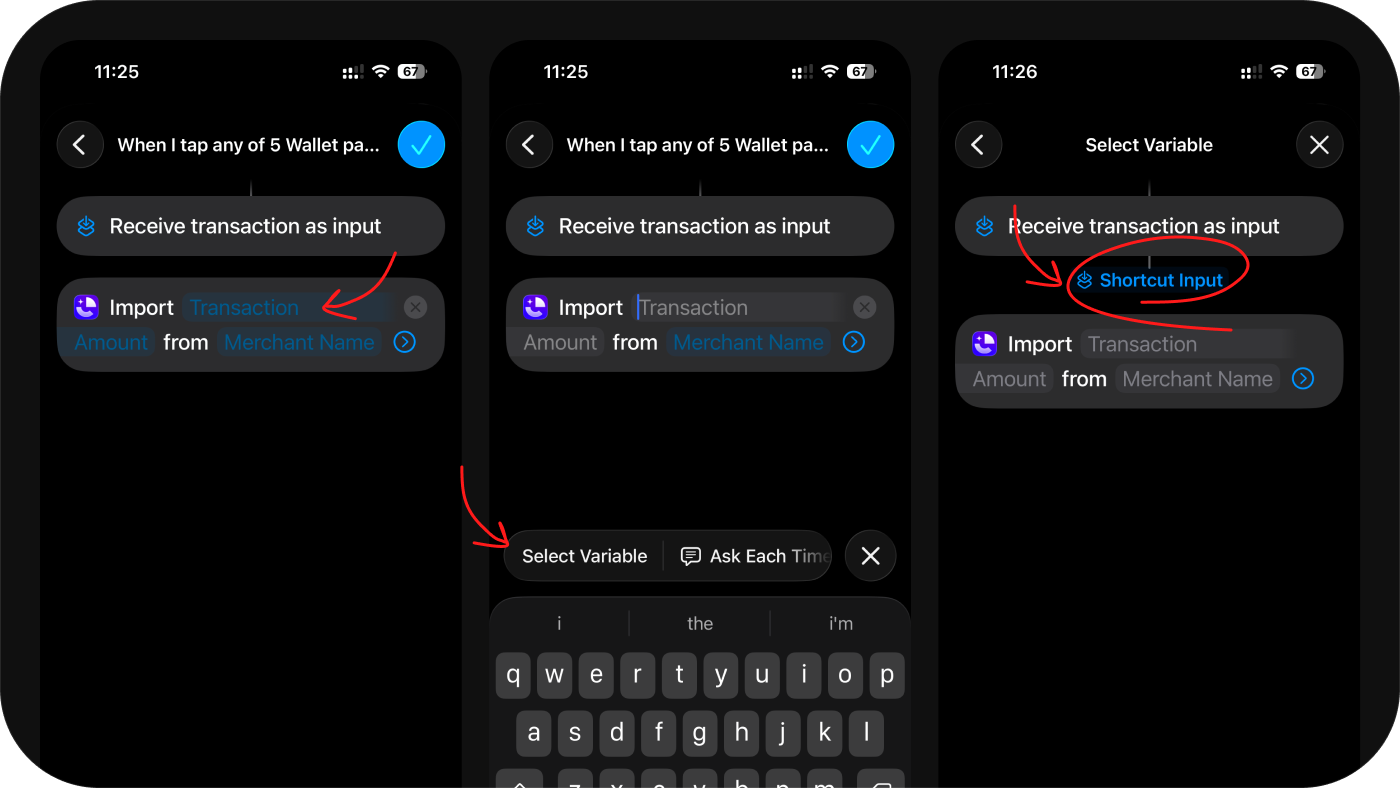
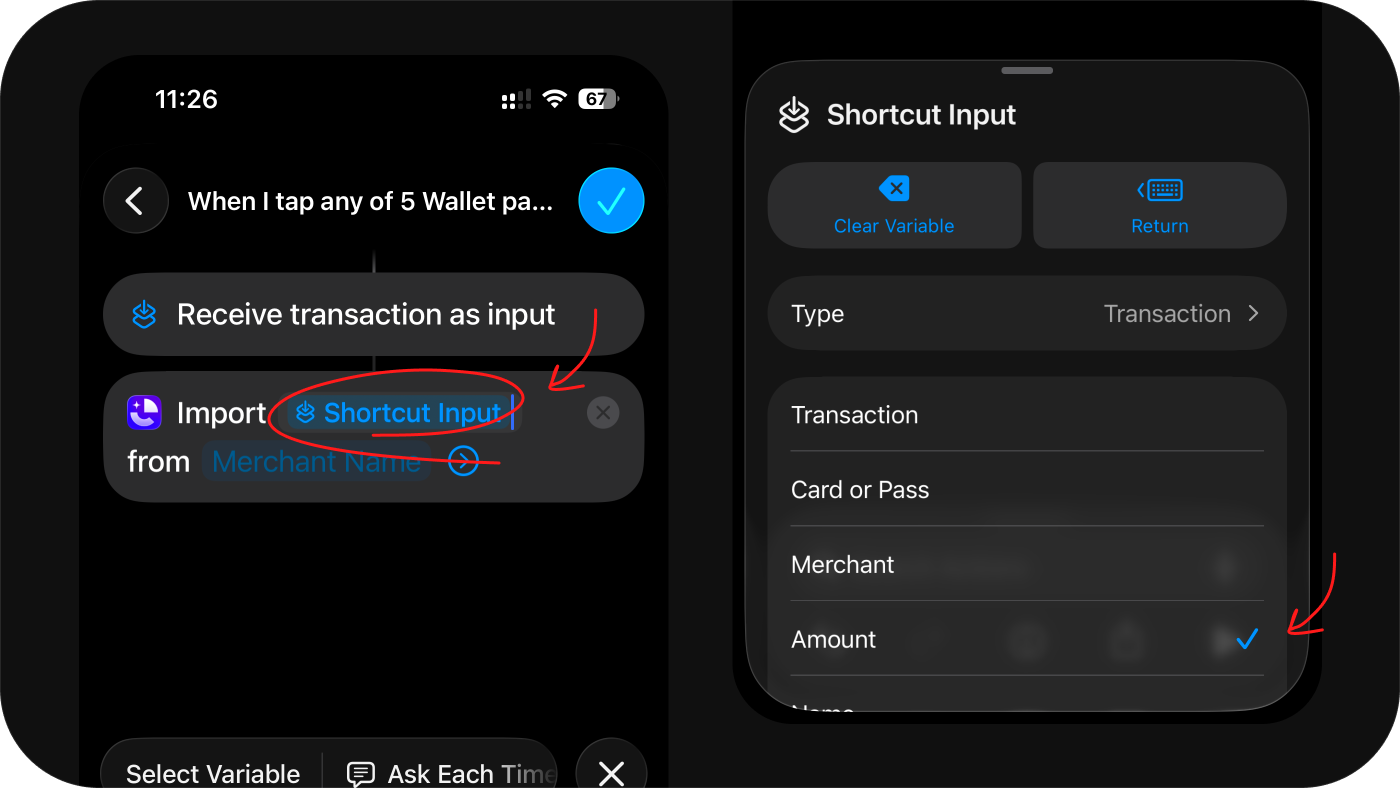
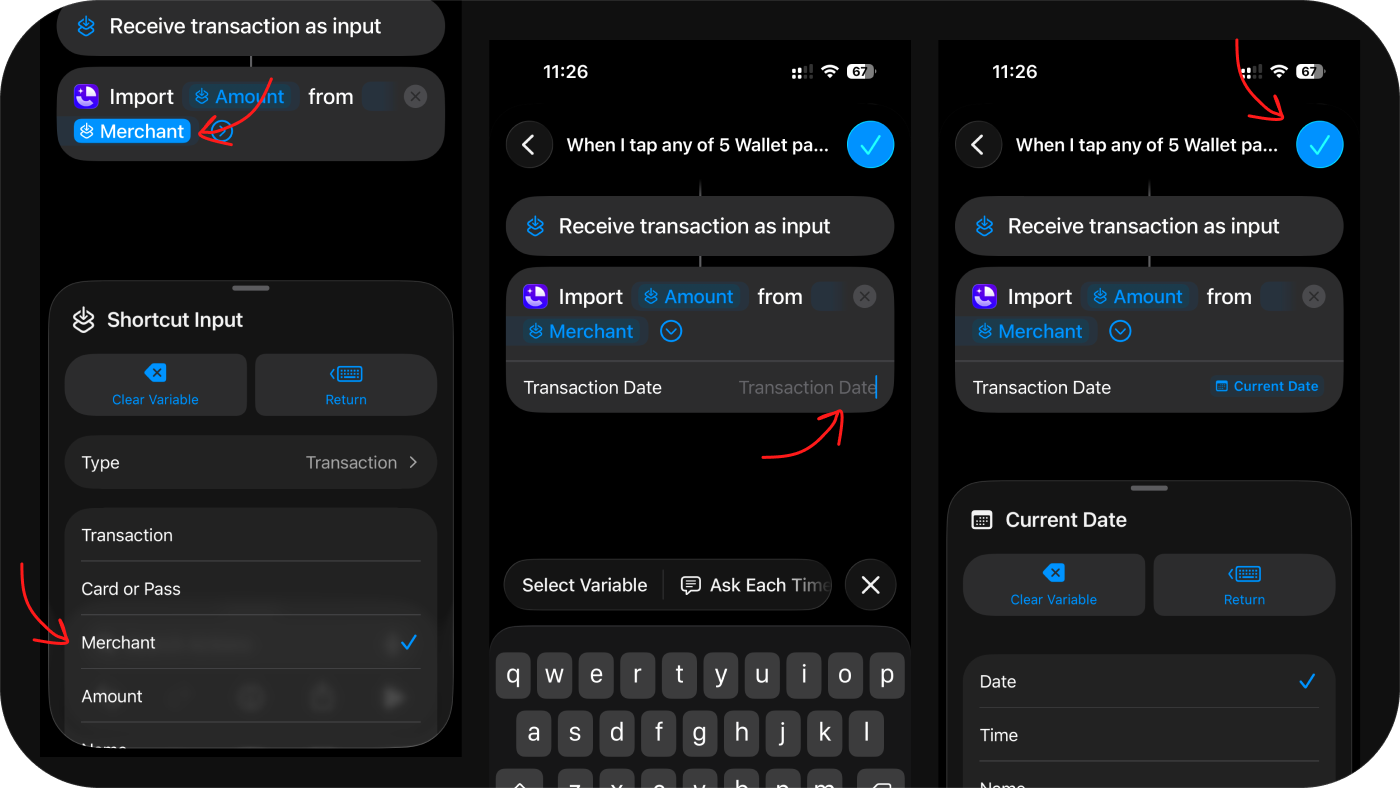
Step 7: Map the transaction fields
Now connect the Apple Pay data to the Expensa fields. For each field in the action, tap it → select Variable → then Shortcut Input, and choose the matching field:
- Transaction Amount → Amount
- Merchant Name → Merchant Name
- Transaction Date → Date (optional)
Step 8: Tap “Done” to save
Tap Done in the top-right corner. Your automation is live.
Make a small real payment with a selected card. Then check the amount, merchant, date and destination space in Expensa before relying on the automation.
Expensa for iPhone Track spending automatically Apple Pay capture, voice entry and budgets. Free to download on the App Store. Get the app
Choosing which space transactions go to
You can choose where new imports are saved in Expensa under Settings → Apple Pay Sync → Save transactions to. Pick the space you want, such as a dedicated “Card” or “Daily” space.
Troubleshooting
The automation asks for confirmation every time — go back into the automation, tap the three-dot menu, and make sure the run mode is set to “Run Immediately”.
Transactions aren’t appearing — check that the Expensa action is the one with all three fields mapped. If any field says “No Variable”, tap it and reassign it.
I can’t find the “Tap to Pay Automation” action — make sure Expensa is installed and open it at least once before searching. iOS needs to register the app’s actions in Shortcuts.
A payment did not appear — check that the correct card is selected and the Wallet trigger ran. Payments outside the trigger’s coverage need another entry method. If you later switch to the iOS 27 Wallet notification setup, disable the older route after testing to avoid duplicate expenses.
Keep reading
View all- 5 Expense Tracker Apps for iPhone Without Bank Linking Compare Expensa, Monefy, Money Manager, Spendee and YNAB for iPhone expense tracking without a bank connection: entry, budgets, sharing and cost.
- Apple Pay in India: Supported Cards, UPI and How to Track Spending Apple Pay launched in India on 30 September 2026. See supported Axis Bank cards, UPI and RuPay limits, setup steps, and how to track spending in INR.
- Set Up Apple Pay Expense Tracking in Expensa on iOS 27 Set up Expensa Wallet Sync on iOS 27 or later: add the shared shortcut, approve its actions, and enable the Wallet notification automation.
- Import a Receipt Screenshot into Expensa with iPhone Back Tap Set up Expensa Scan Receipt in Shortcuts, assign it to iPhone Back Tap, and turn an onscreen receipt into an expense without opening the app.
- Monarch Money vs Rocket Money: Budgeting, Subscriptions and Cost Compare Monarch Money and Rocket Money in 2026 by budget tools, subscription help and cost. See where Expensa fits if you don't want a bank connection.
- Best Free Expense Tracker Apps for iPhone: Features and Limits Compare Dime, Monefy, Spendee, Wallet and Expensa by what stays free: entry, budgets, account limits, Apple Pay tracking and export.
Stop tracking.
Start knowing.
Capture eligible Apple Pay purchases after setup, add expenses by voice and see what remains in your budget.
Download for iPhone