Set Up Apple Pay Expense Tracking in Expensa on iOS 27
Set up Expensa Wallet Sync on iOS 27 or later: add the shared shortcut, approve its actions, and enable the Wallet notification automation.
Get the appThe short answer: On iOS 27 or later, open Expensa → Settings → Apple Pay Sync → Apple Pay transaction import. Add the ready-made Expensa Wallet Sync shortcut, run it once to approve its actions, then enable its Wallet notification automation. This setup can capture new eligible payments; it does not import past Wallet history.
The Expensa screens below were captured on an iPhone 18 Pro simulator on September 29, 2026. The remaining screenshots show the supplied iOS 27 Shortcuts setup. If your iPhone runs iOS 26 or earlier, follow the separate manual Transaction automation guide.
You need Expensa, Shortcuts, Apple Pay set up on your iPhone, Wallet notifications enabled, and a space in which to save expenses. In Settings → Apple Pay Sync, use Save transactions to if you want imports to go to a different space.
If you are in India, check which Axis Bank cards Apple Pay supports at launch and how UPI payments differ before setting up this shortcut.
Add Expensa Wallet Sync
In Expensa, open Settings → Apple Pay Sync → Apple Pay transaction import. This is the screen to use for Apple Pay. The separate Double tap import from screenshot option is for a receipt visible on your screen; its setup is explained here.
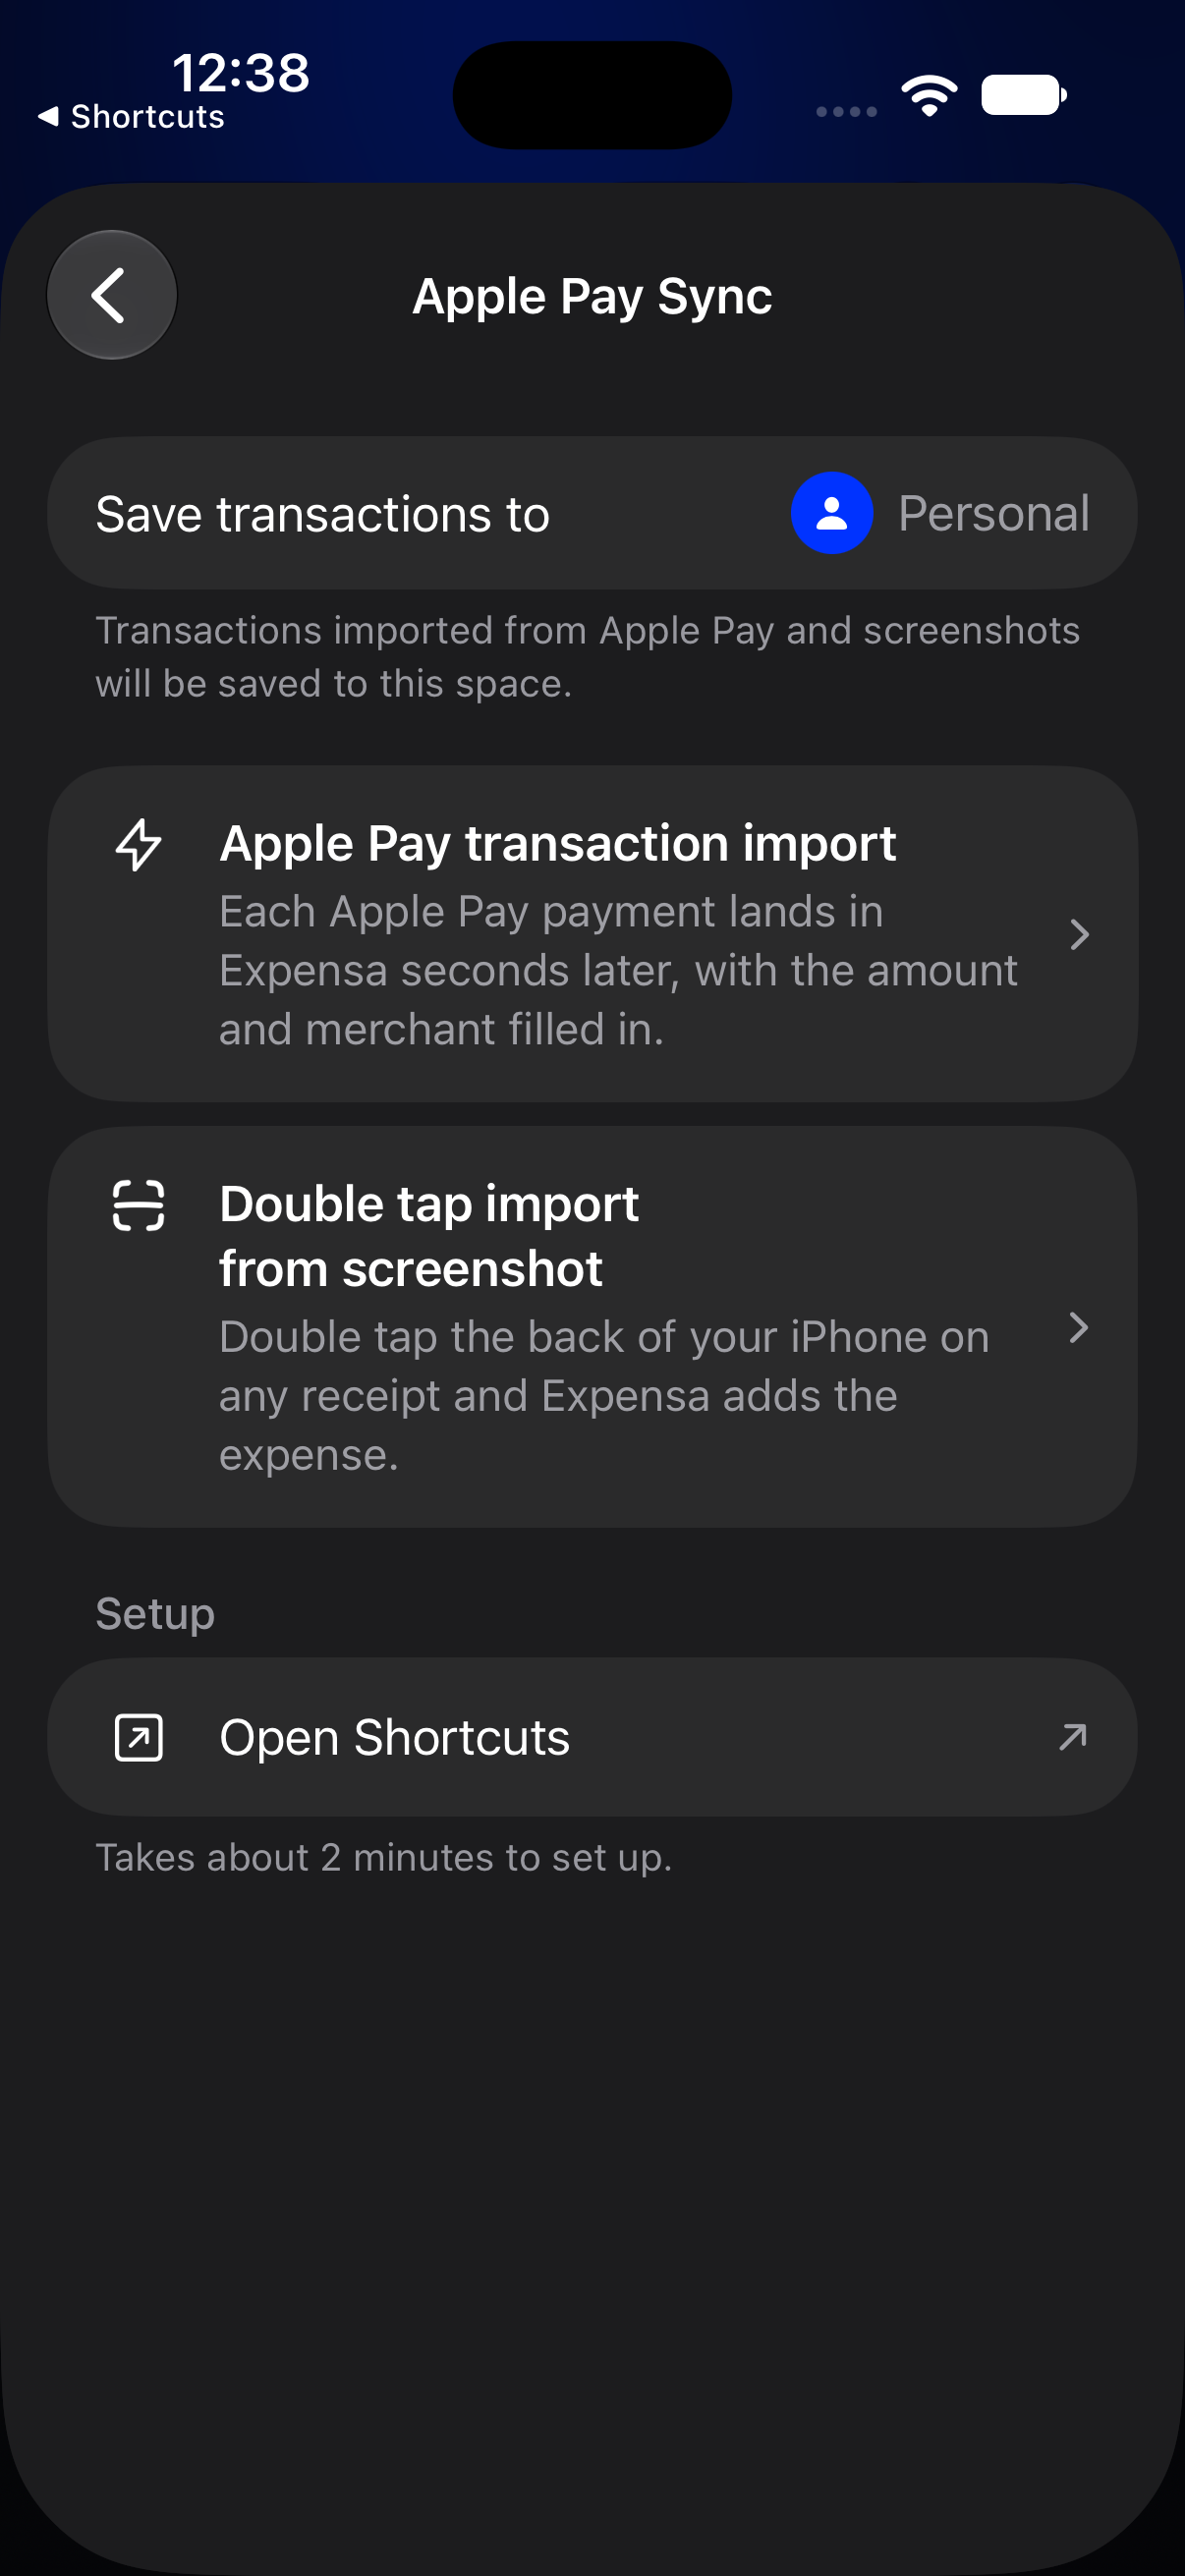
1. Add the shared shortcut
Tap Add shortcut in the Expensa guide. Shortcuts opens the Expensa Wallet Sync card; tap Add Shortcut. You do not need to assemble the actions or select individual cards for this route.
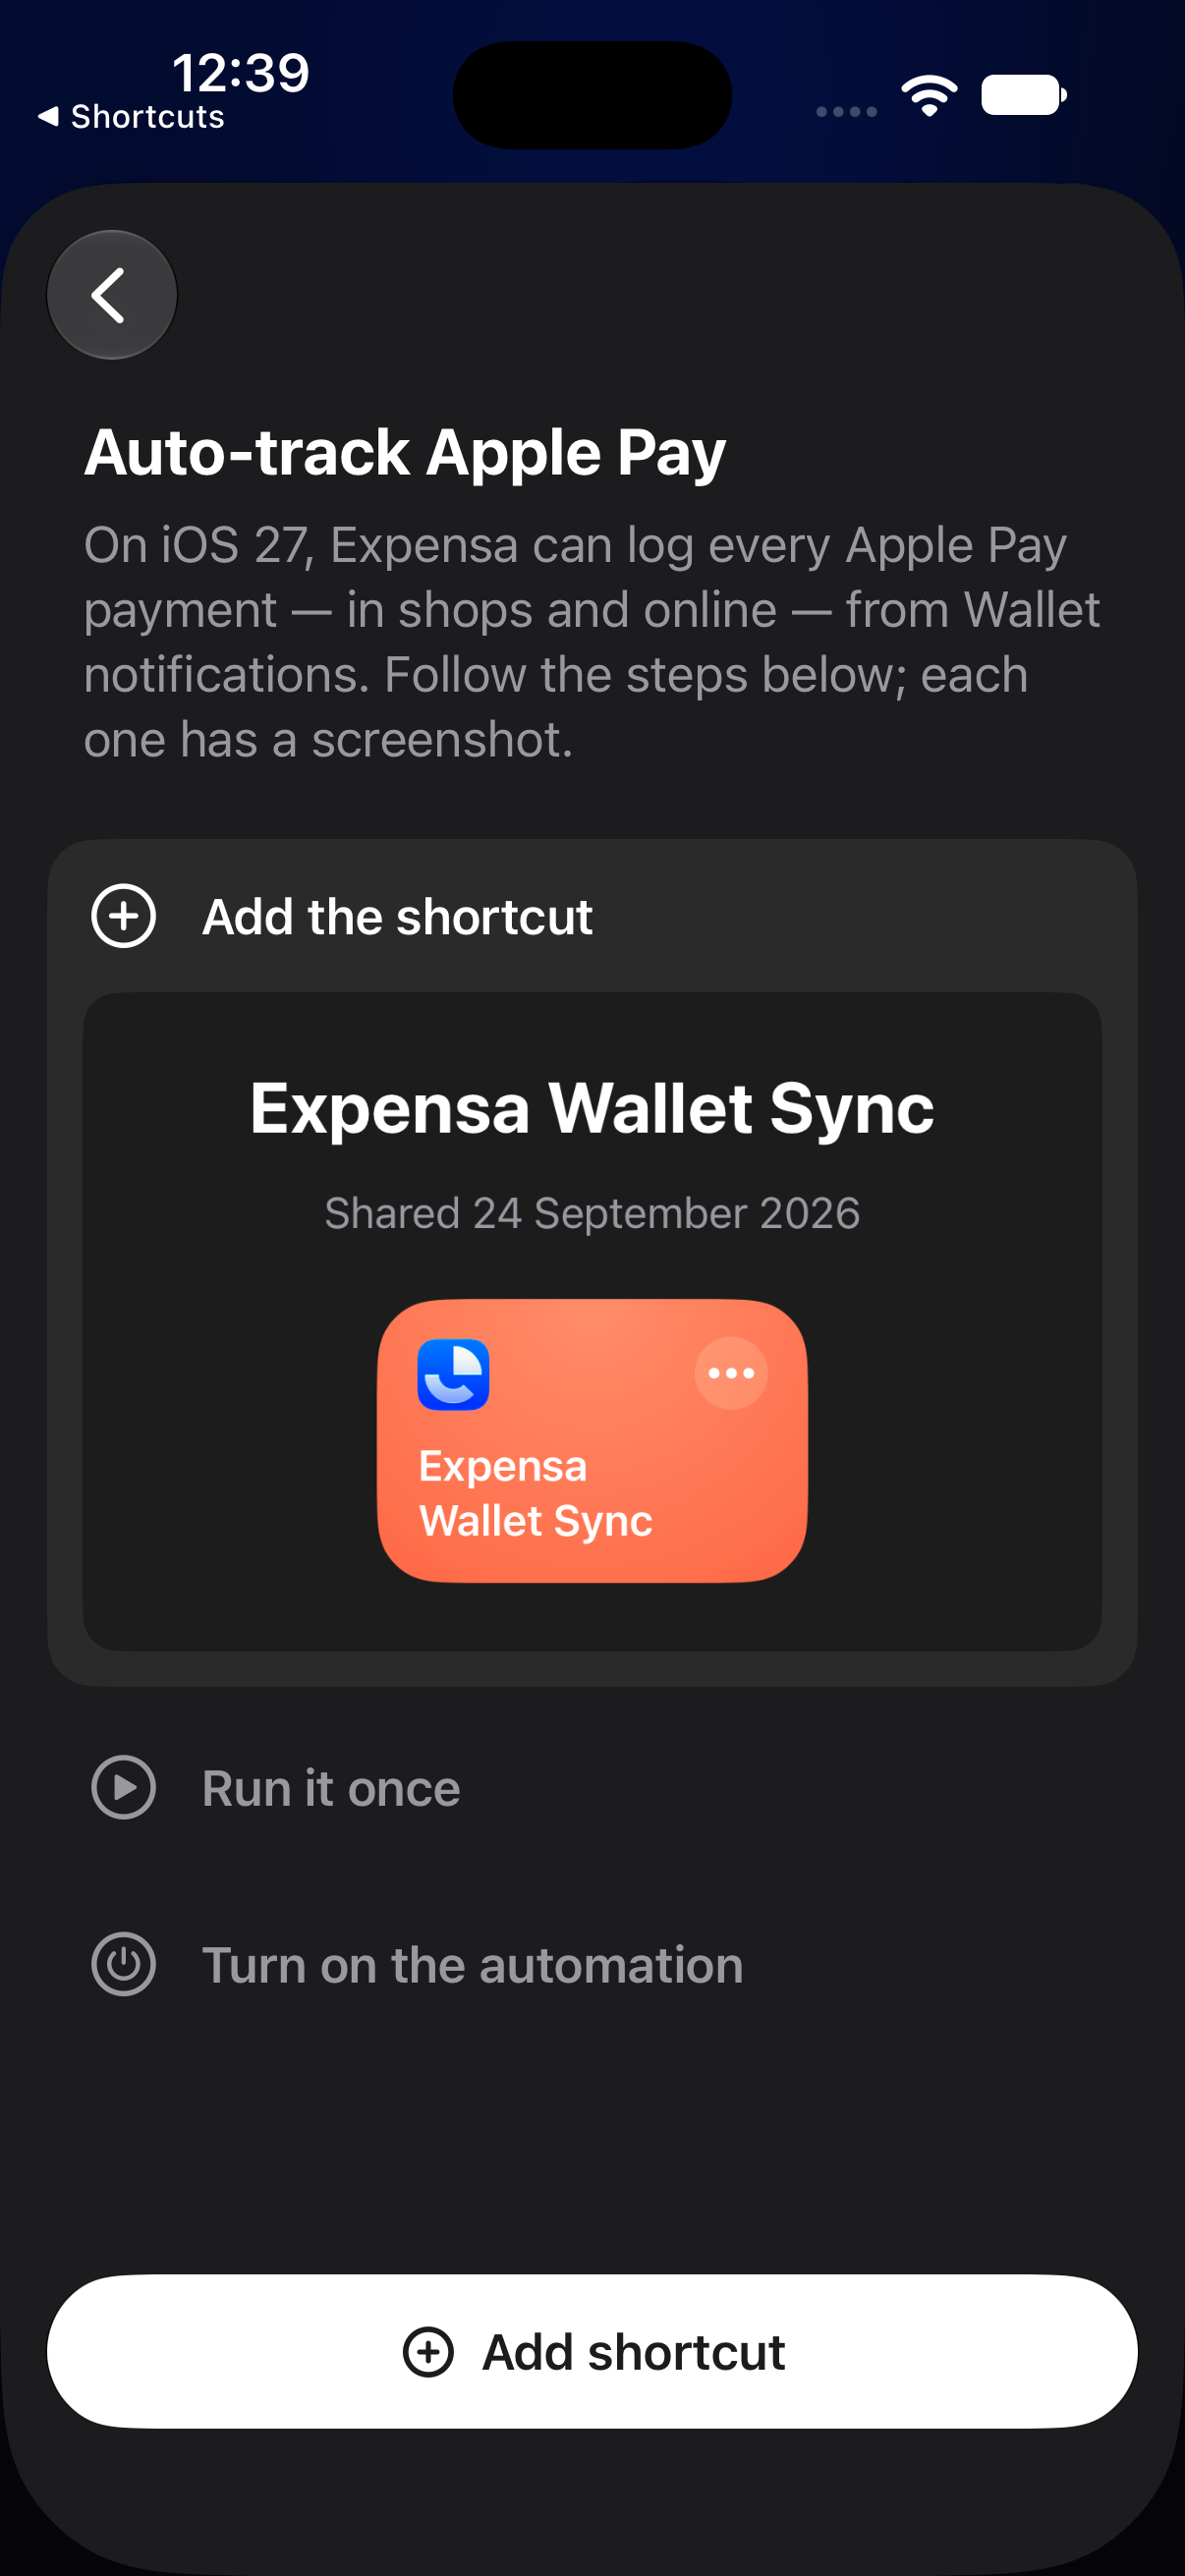
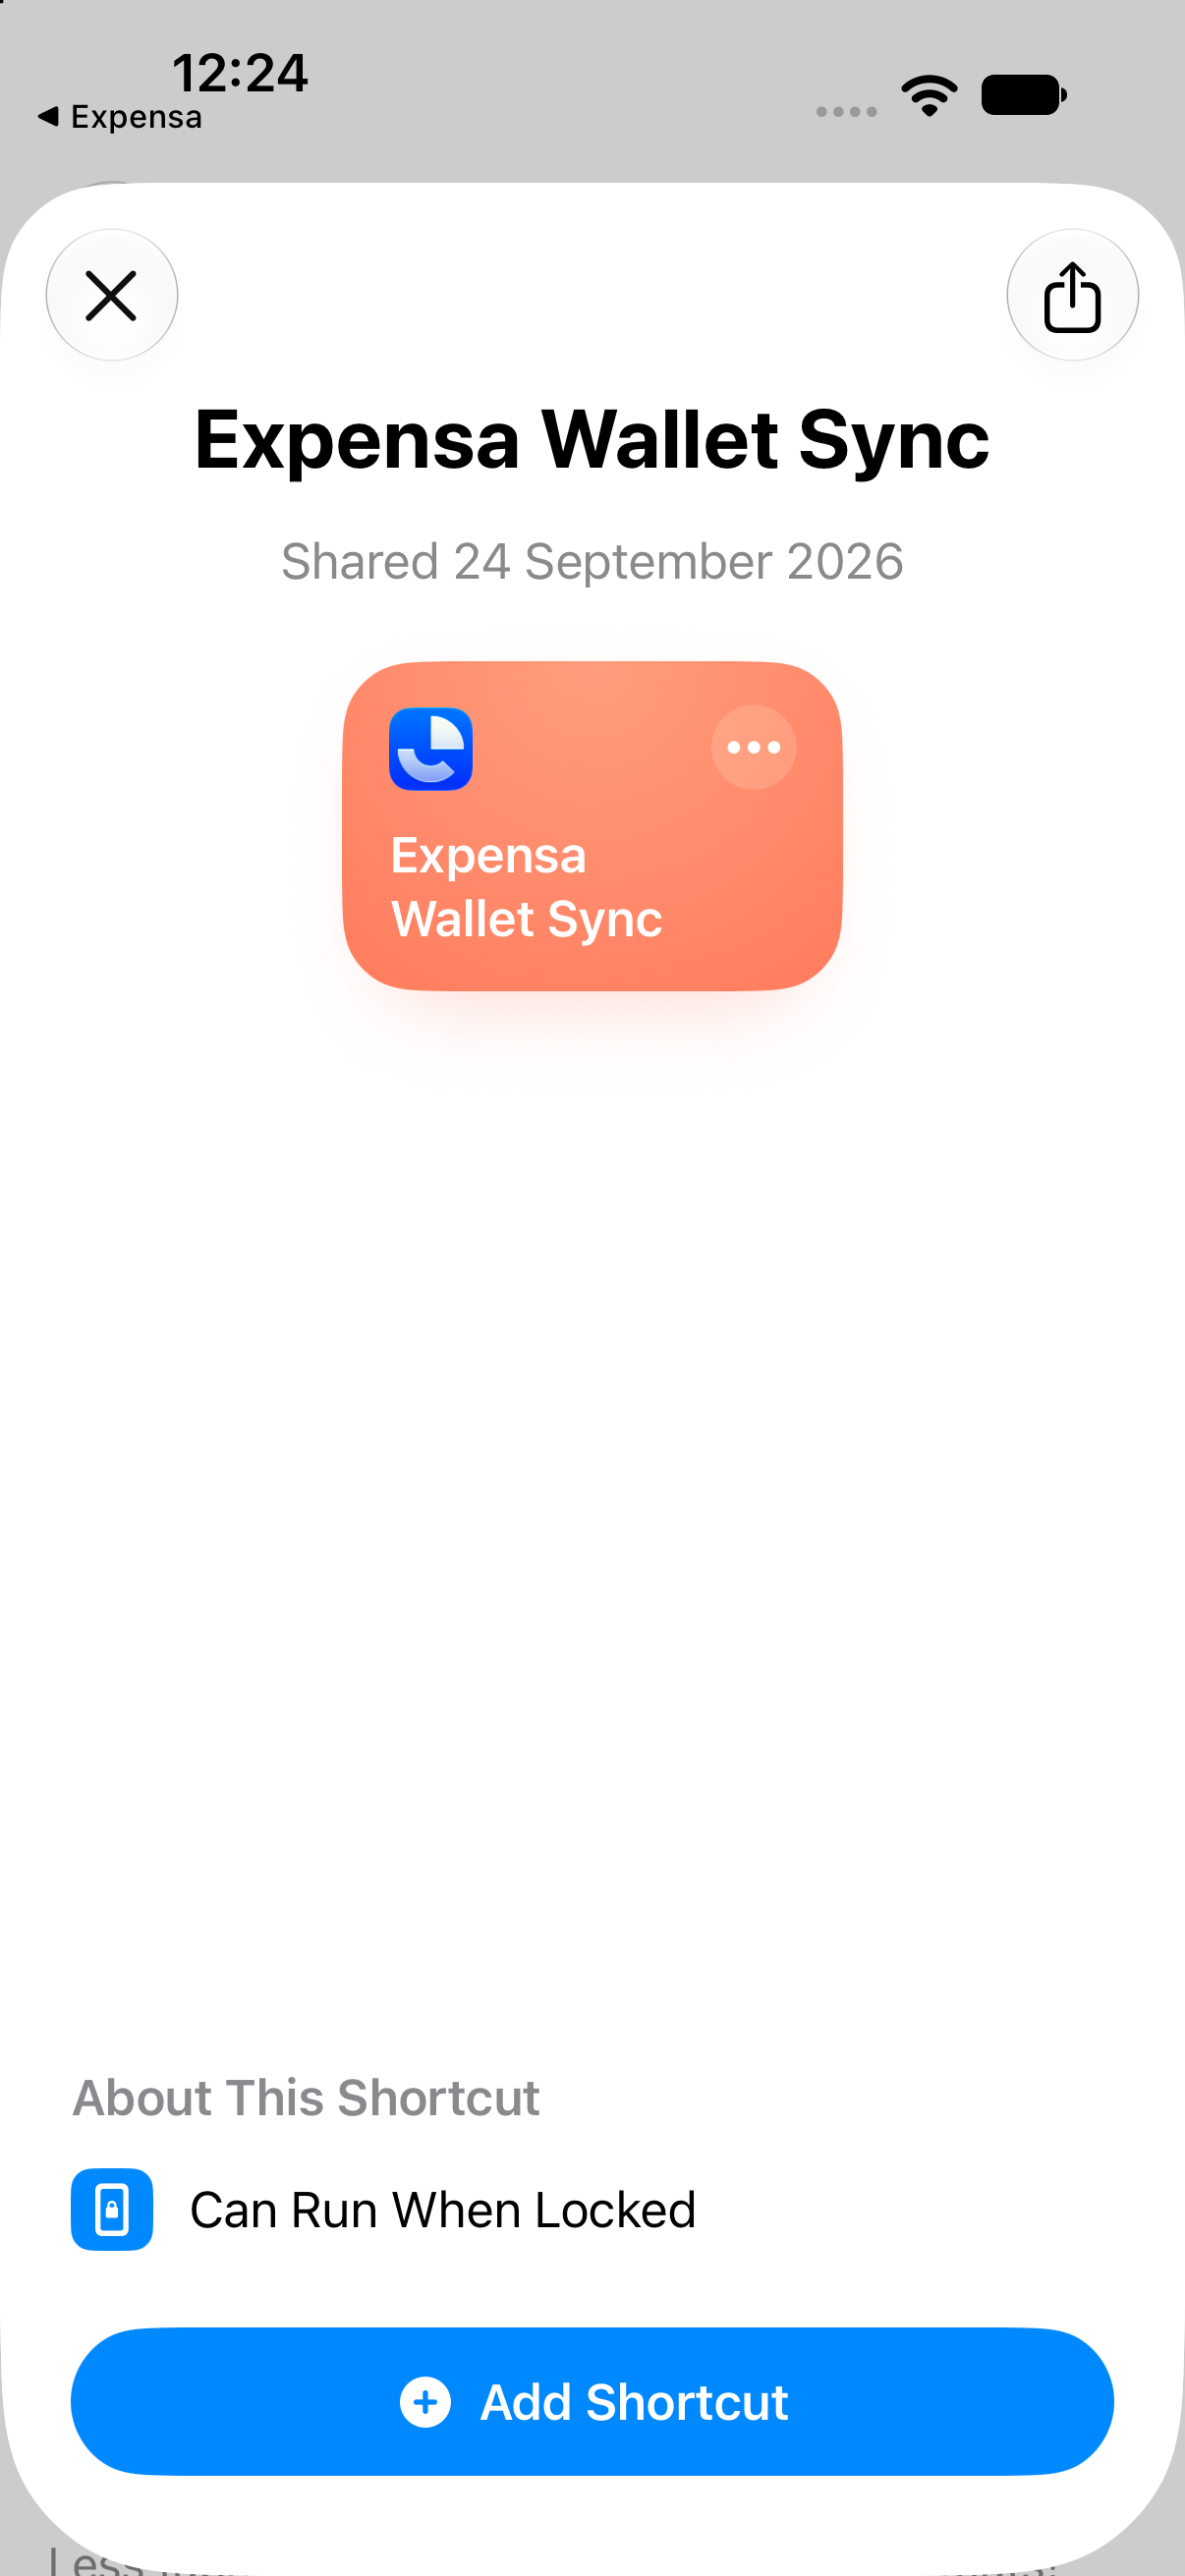
2. Run it once and allow Expensa actions
Return to Expensa, tap Run it once, and approve the Shortcuts prompt to run actions from Expensa. This first run checks the connection and moves the permission question out of your next payment. If the guide does not confirm the test, run the shortcut again and return to the guide.
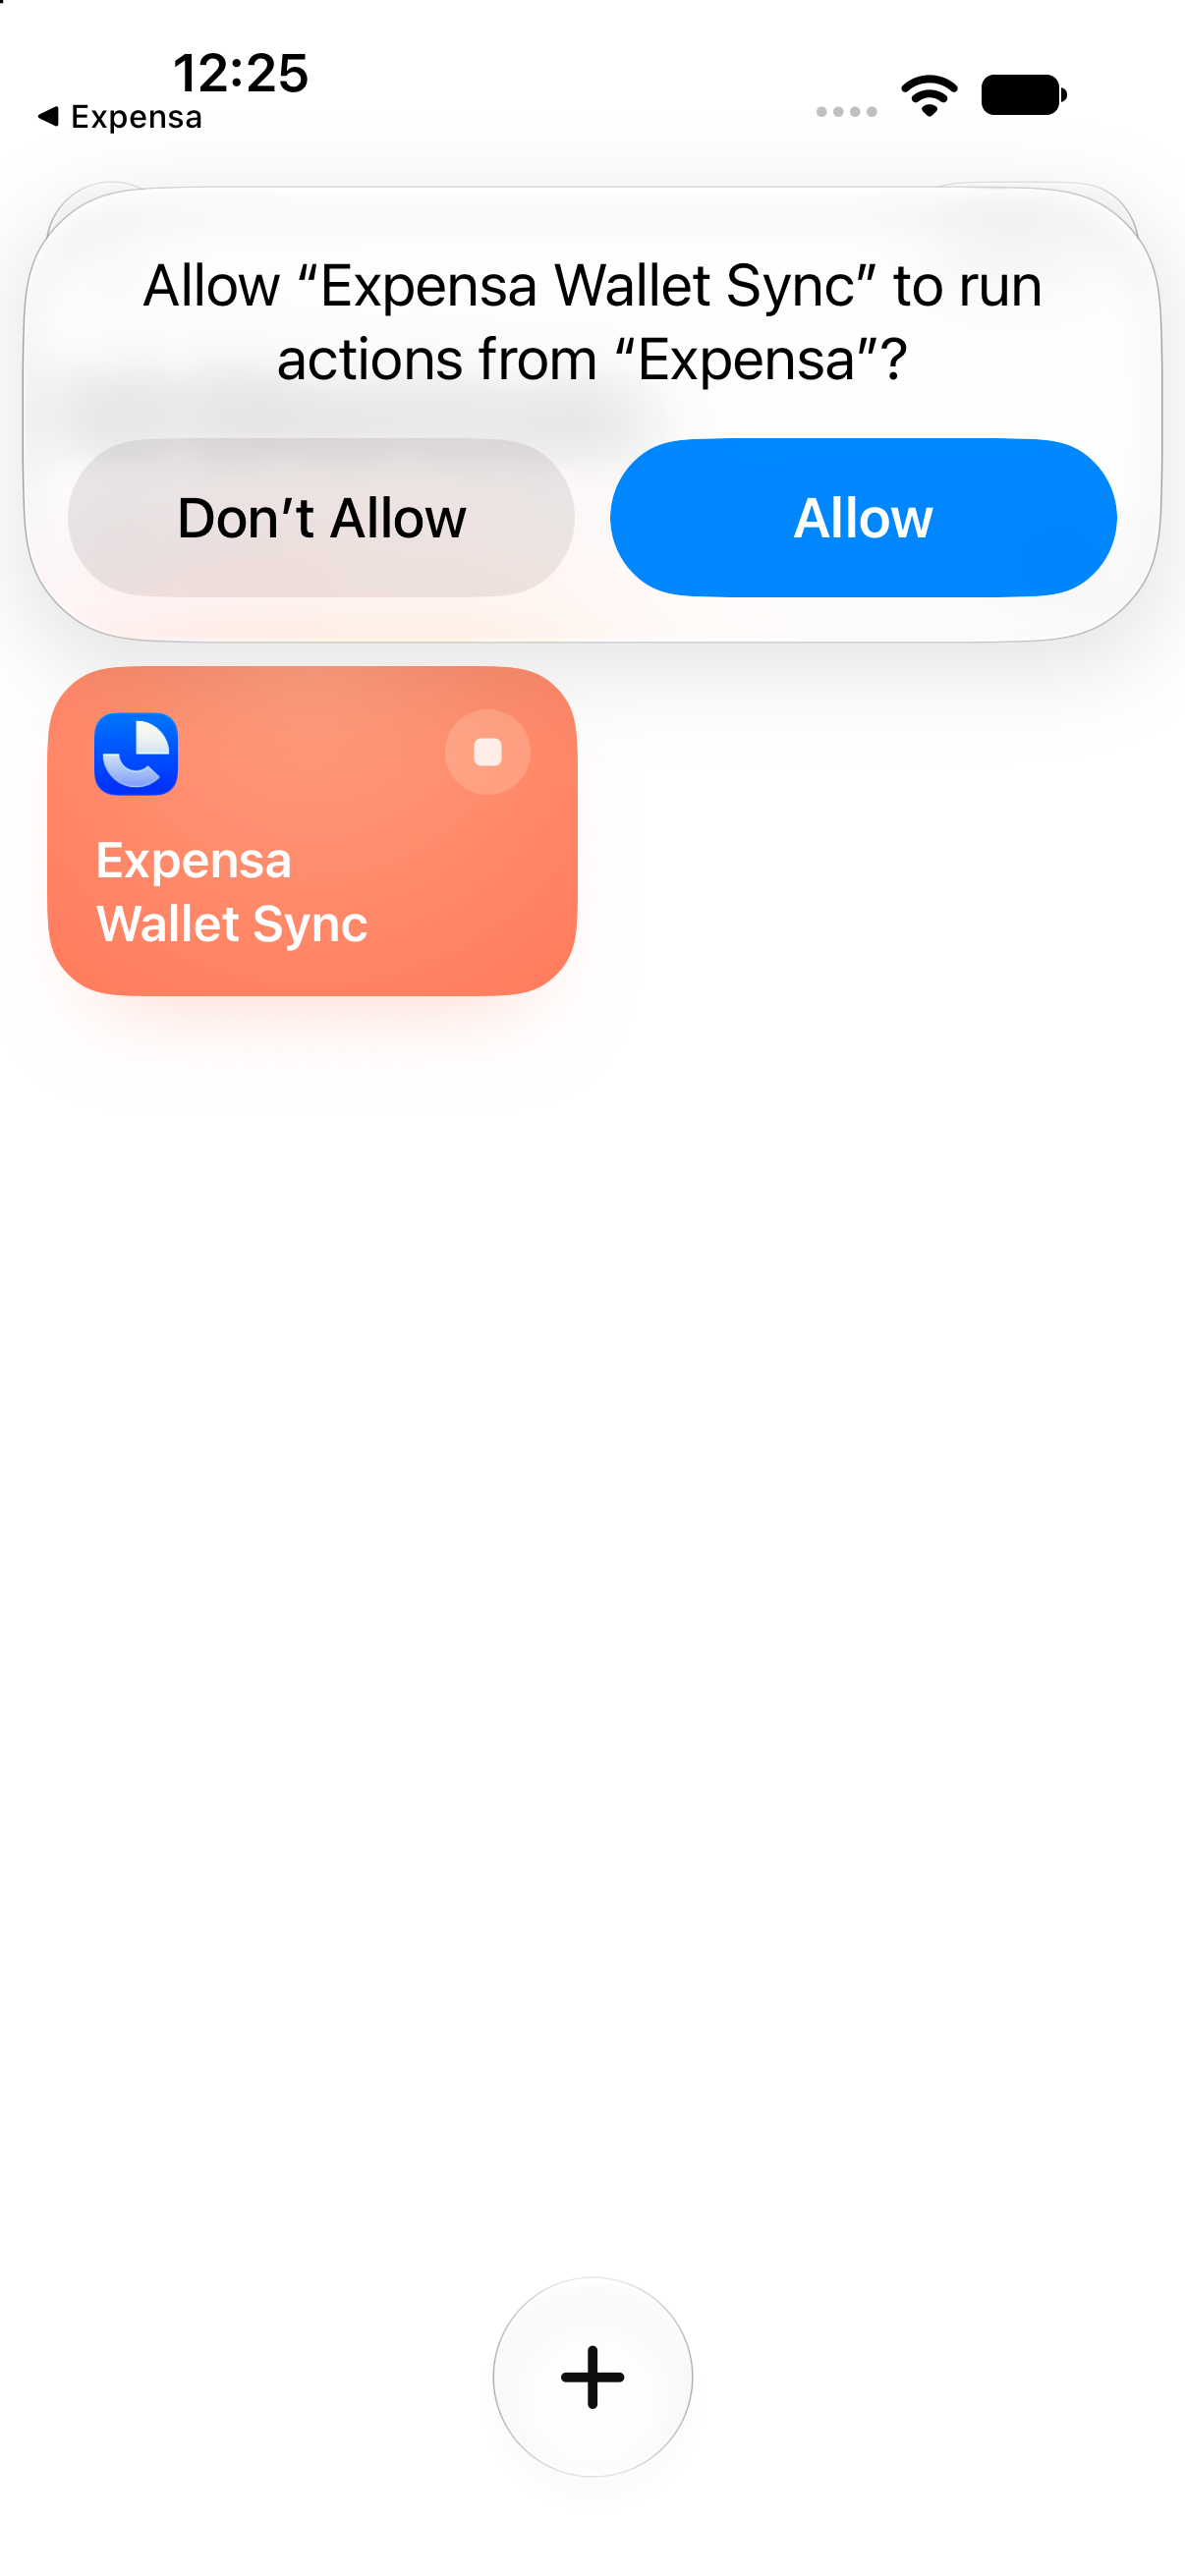
3. Turn on the Wallet automation
Tap Turn on the automation in the guide. In Shortcuts, open Expensa Wallet Sync and switch Automation on for its When I receive a notification from Wallet trigger. The shortcut passes information from that notification to Expensa. Apple documents notification-based automations in Shortcuts. The screen may still show Notify off; that switch controls Shortcuts’ own run notification, not whether Wallet may notify you.
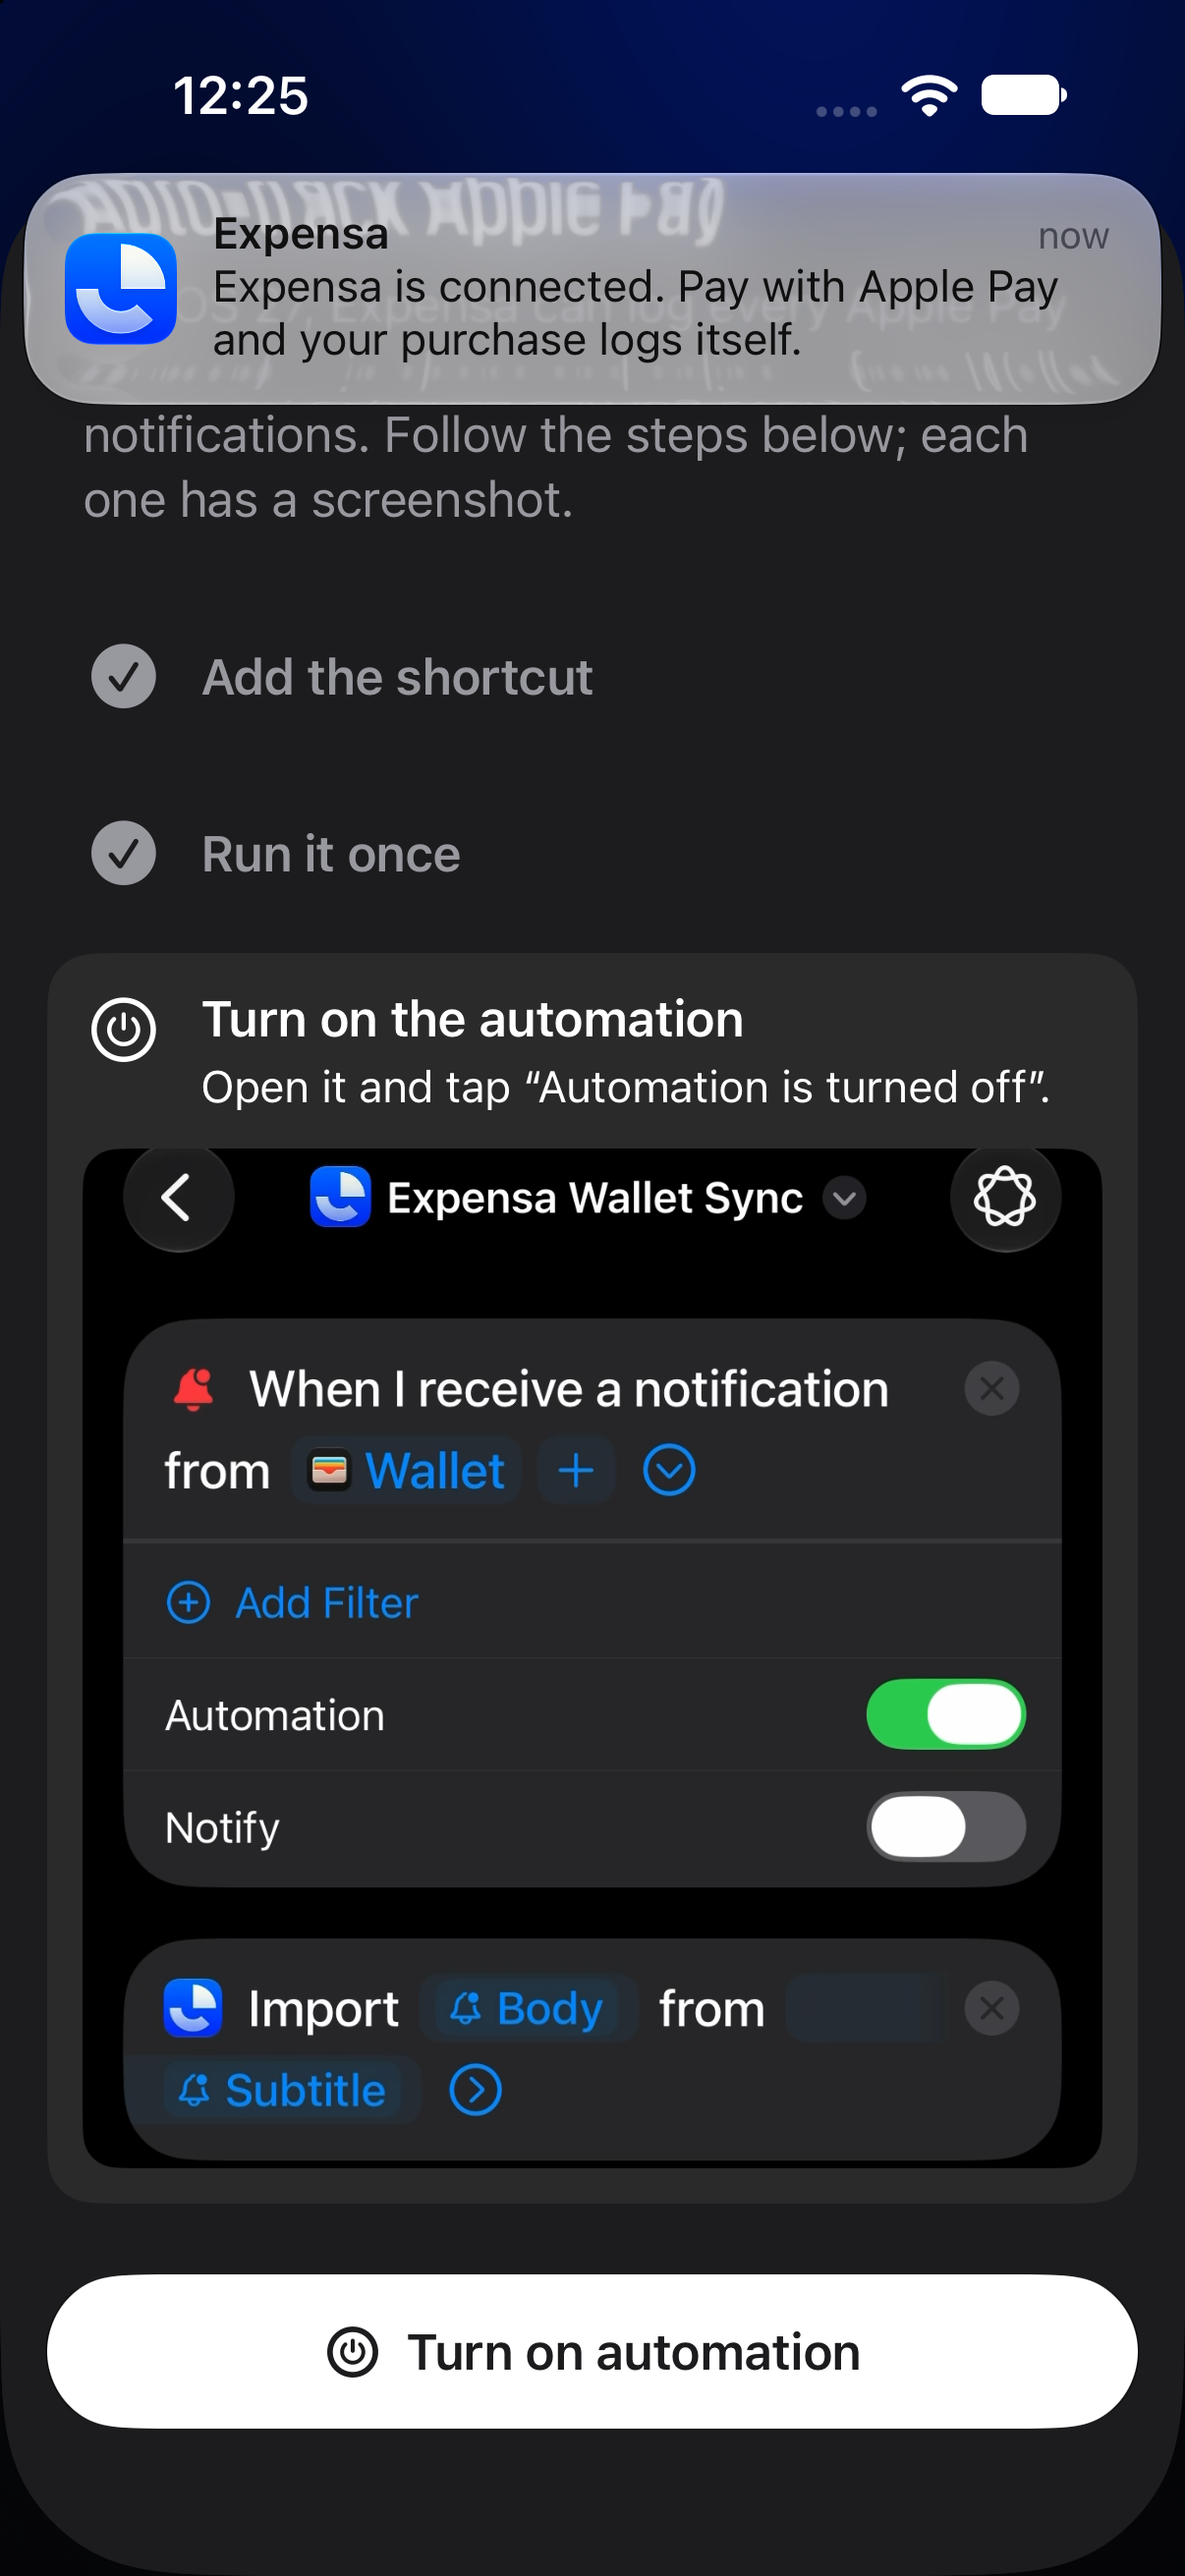
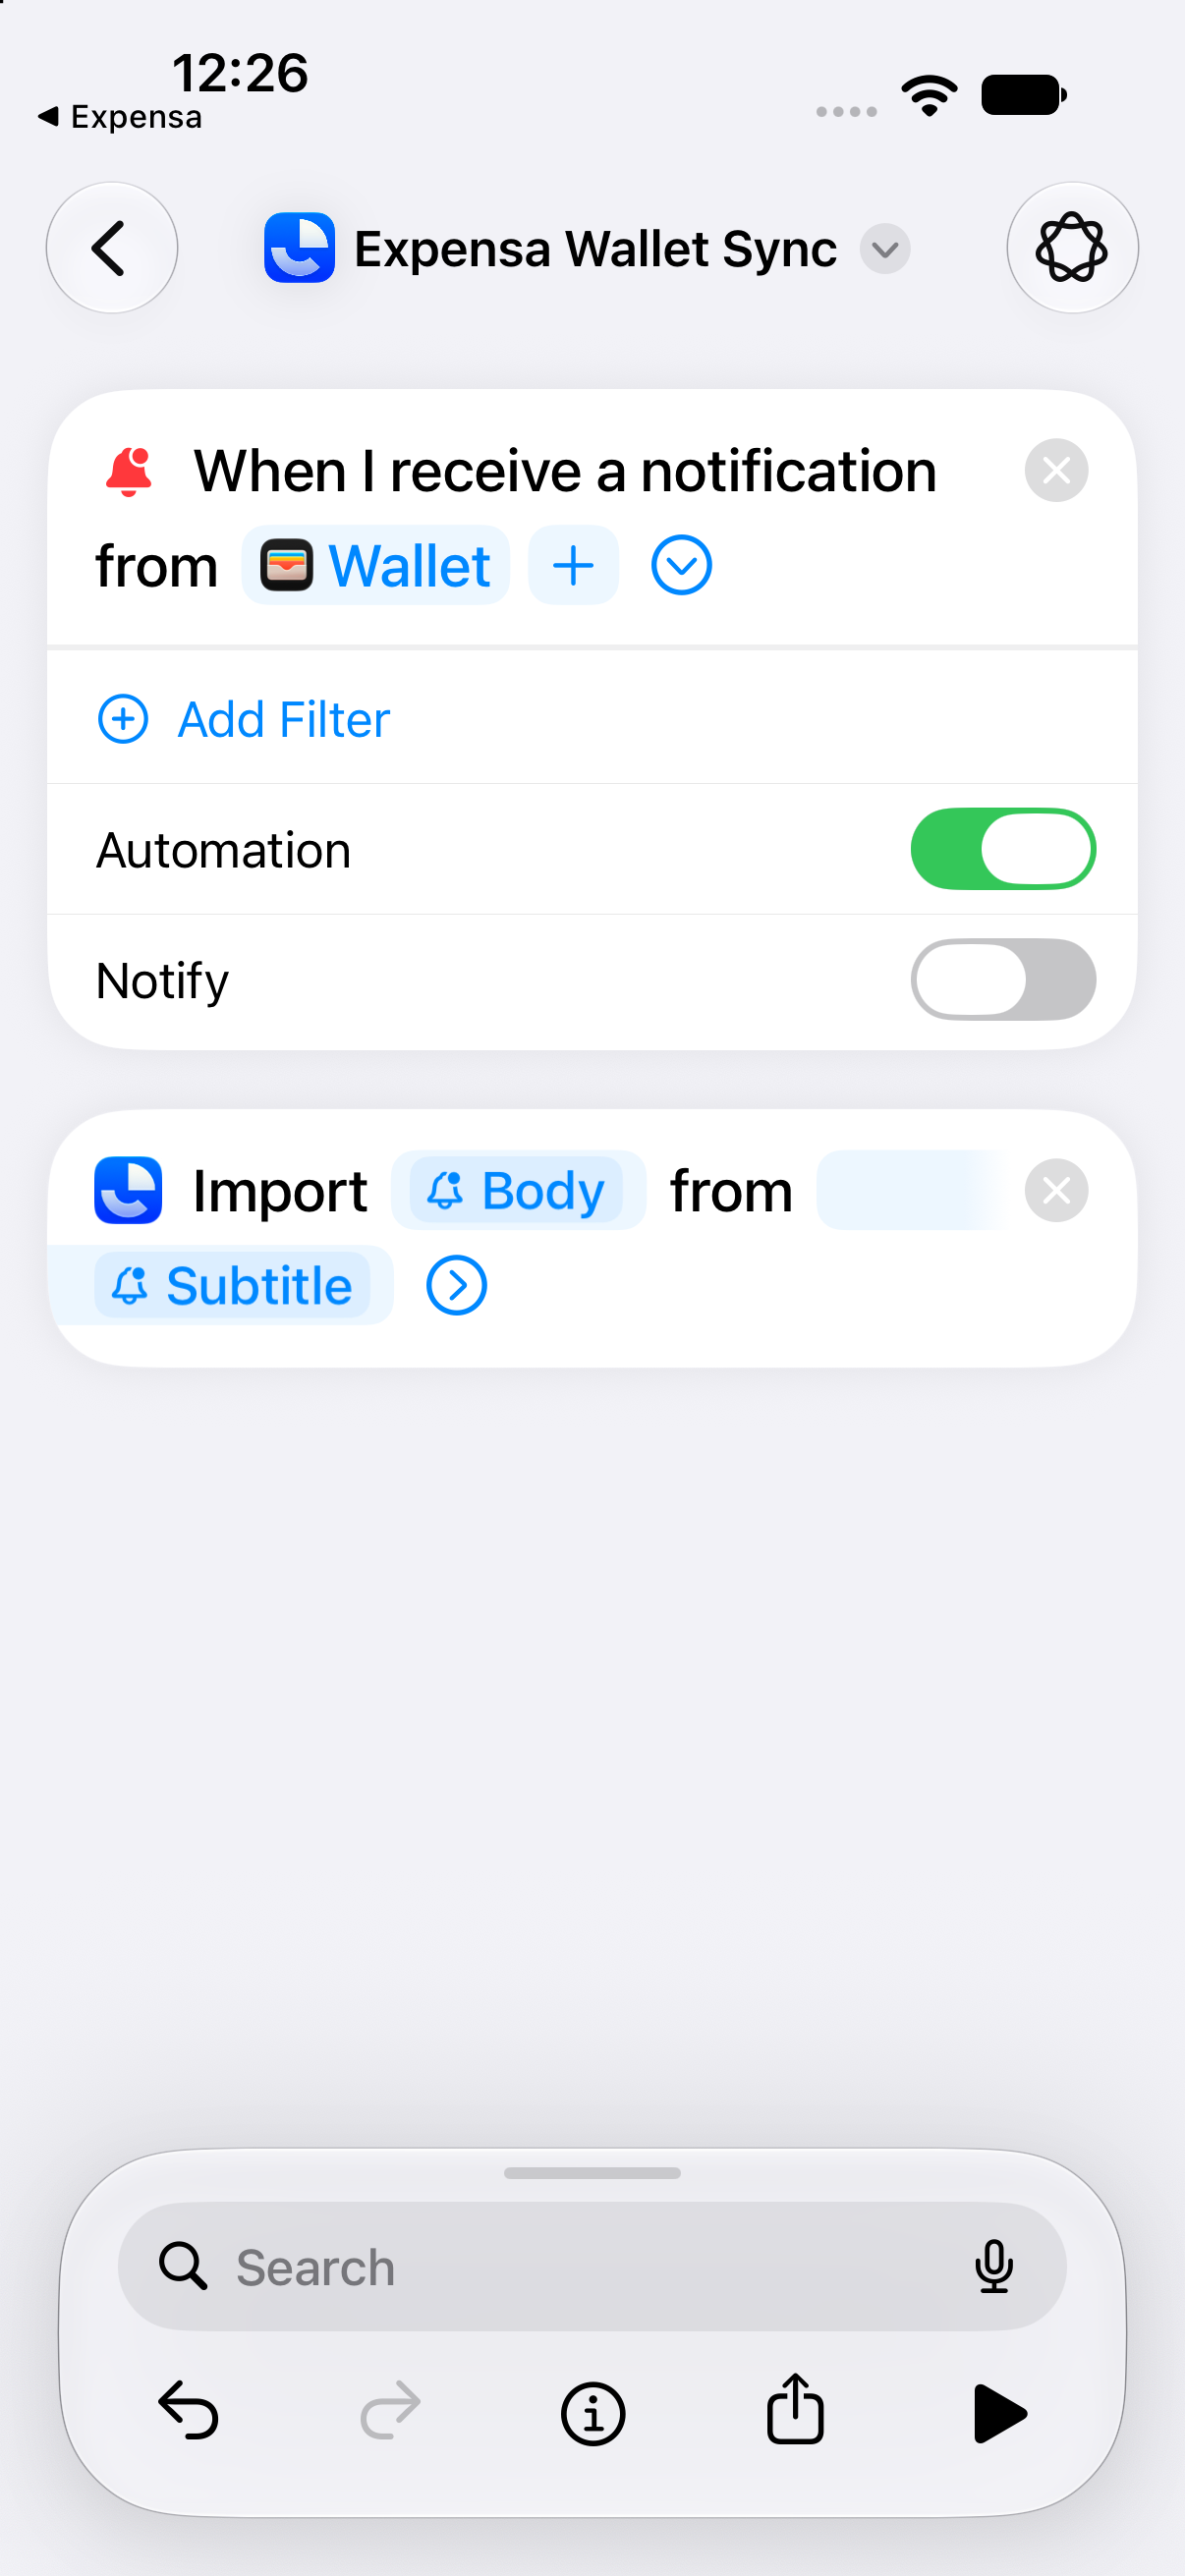
The trigger needs Wallet to produce a transaction notification. Check Wallet notification permission and make one small real payment before relying on it. A simulator walkthrough confirms the setup screens, but cannot prove that your bank sends a Wallet notification for every card or purchase. If you already use an older Wallet card-tap automation, turn one route off after verifying the new one so a qualifying payment is not saved twice.
Expensa for iPhone Track spending automatically Apple Pay capture, voice entry and budgets. Free to download on the App Store. Get the appIf a payment does not appear
Confirm the shortcut is installed, its Automation switch is on, and Wallet actually showed a transaction notification. Reopen the Expensa guide and repeat Run it once if its test did not succeed. Verify the destination space in Save transactions to and check for an error notification. Cash, bank transfers and purchases that do not produce a Wallet notification need another entry method.
This setup only covers future payments. For older transactions, see what you can export from Wallet and your card provider.
Keep reading
View all- 5 Expense Tracker Apps for iPhone Without Bank Linking Compare Expensa, Monefy, Money Manager, Spendee and YNAB for iPhone expense tracking without a bank connection: entry, budgets, sharing and cost.
- Apple Pay in India: Supported Cards, UPI and How to Track Spending Apple Pay launched in India on 30 September 2026. See supported Axis Bank cards, UPI and RuPay limits, setup steps, and how to track spending in INR.
- Import a Receipt Screenshot into Expensa with iPhone Back Tap Set up Expensa Scan Receipt in Shortcuts, assign it to iPhone Back Tap, and turn an onscreen receipt into an expense without opening the app.
- Monarch Money vs Rocket Money: Budgeting, Subscriptions and Cost Compare Monarch Money and Rocket Money in 2026 by budget tools, subscription help and cost. See where Expensa fits if you don't want a bank connection.
- Best Free Expense Tracker Apps for iPhone: Features and Limits Compare Dime, Monefy, Spendee, Wallet and Expensa by what stays free: entry, budgets, account limits, Apple Pay tracking and export.
- How to track expenses in Pakistan on iPhone when nothing syncs with your bank? No Apple Pay, no bank sync, money split across cash, JazzCash and a bank card. A setup that tracks it all in rupees in a few minutes a week.
Stop tracking.
Start knowing.
Capture eligible Apple Pay purchases after setup, add expenses by voice and see what remains in your budget.
Download for iPhone